Tank Extension
![]()
|
Tank Extension
|
|
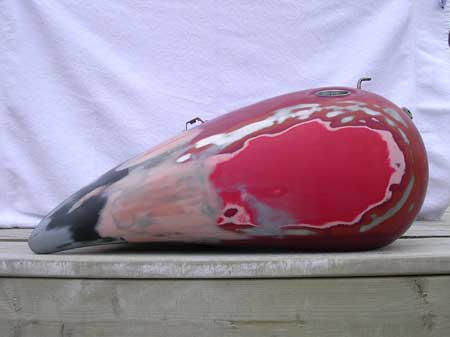
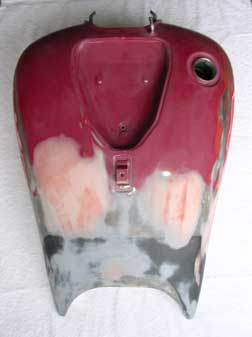
| I grafted a Baron's 3.5" tank extension onto my tank. I first sanded the tank down to the primer. I placed the tank on a level surface and inserted a 1/2" square piece of wood under the tank, approximately 6" from the back. I then slipped on the extension as far as it would go and moved the piece of wood back and forth until I obtained the proper curvature on the bottom. The extension was not symmetrical on each side of the tank, so I just worked on getting one side perfect. I marked the leading edge of the extension on the tank with a marker. I did this a few times to make sure it was where I wanted it and I could do this easily. To glue the extension on the tank I used ProForm PF 7773 Pliogrip urethane structural adhesive. PF 7773 has open/sand/clamp times of 3.5/30/10. There are other times available but I considered these times perfect for my ability. The adhesive comes in two attached tubes which require a special gun to apply. I spread the adhesive mixture on the tank and slipped the extension to the mark. I them used clamps to secure the bottom of the extension to the tank. I also added an additional 2" fiberglass extension to the Baron's extension, on top, as there was a gap between the tank and my seat due to my modifying the A-frame. I filled in the back and bottom of the extension so that it looks solid. Next time I think I'll make my own extensions. I find the Baron's are a bit wide and would like the tank narrower in the rear.
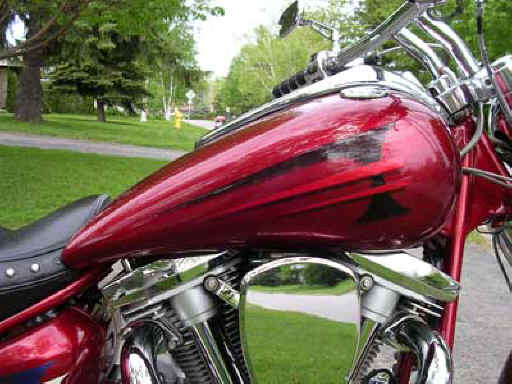
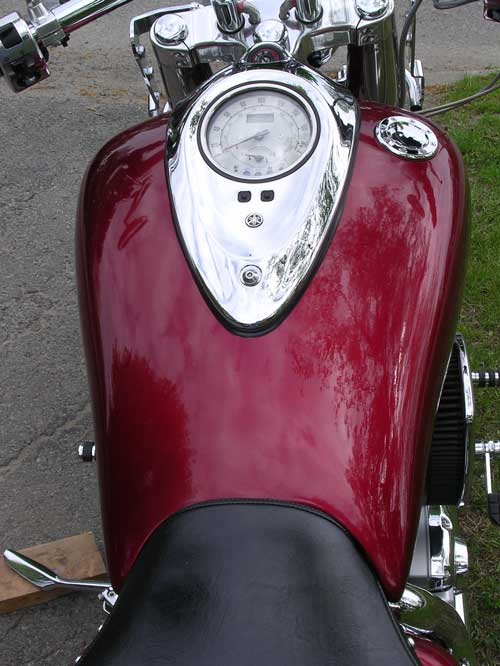
Here's how it turned out. I have also installed a KuryAkyn fuel cap. The cap is the non-venting style. The part that goes into the tank must be ground down as it is a little bigger than the opening on the tank.
|