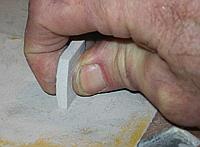
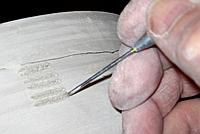
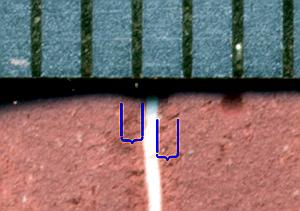
 The thicker the consistency of the glaze mix, the thicker will be the resulting glaze
layer. Since layer thickness is what's important, I measure that directly. Dip a shard
into the glaze for two seconds, remove and let dry. Scratch through the layer with a
sharp steel corner (I use a cabinet scraper) held at 45°, then measure the edge
exposed: 0.41 mm here. This horizontal distance is the same as the vertical depth
of the layer, but is much easier to measure. (I use a digital scanner at
200 pixels/mm then print at 20x life size.) Using the average of the two exposed
edges ensures the correct answer even if the scraper was not held exactly at 45°.
By the way, the resulting fired thickness of this glaze, measured by breaking the shard
and scanning it edge on, was 0.20 mm.
The thicker the consistency of the glaze mix, the thicker will be the resulting glaze
layer. Since layer thickness is what's important, I measure that directly. Dip a shard
into the glaze for two seconds, remove and let dry. Scratch through the layer with a
sharp steel corner (I use a cabinet scraper) held at 45°, then measure the edge
exposed: 0.41 mm here. This horizontal distance is the same as the vertical depth
of the layer, but is much easier to measure. (I use a digital scanner at
200 pixels/mm then print at 20x life size.) Using the average of the two exposed
edges ensures the correct answer even if the scraper was not held exactly at 45°.
By the way, the resulting fired thickness of this glaze, measured by breaking the shard
and scanning it edge on, was 0.20 mm.
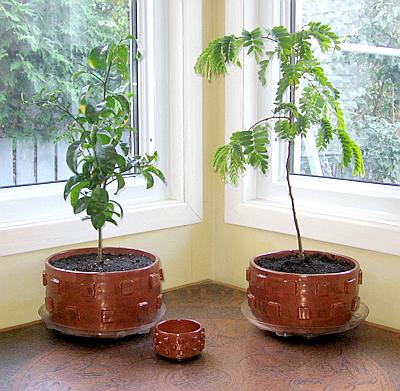
Appliquée
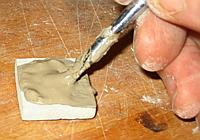
This is the technique I've found to be most reliable to add raised features to a pot. I'm told that it's the method used in Jingdezhen China to add pieces to their porcelain, which is trimmed when bone dry.- Start with some of the clay used for the pots and applied pieces. Add about 5% sodium silicate (37% solution) and about 5% of a clear glaze suitable for your firing temperature to the clay, then enough water to make the consistency like thin cream. Let stand for a day to gell; if it gells too stiff for brushing even after shaking, add more water.
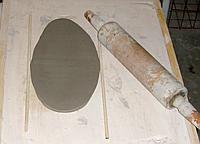
- Roll clay flat to the desired thickness. Wood dowel comes in any desired diameter.
- Cut out your shapes. For square ones, I use a piece of wood the desired width as a guide for a paint scraper.
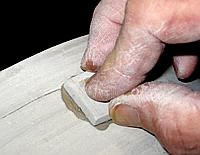
- Lay the pieces on the pot to dry with curvature matching the pot.
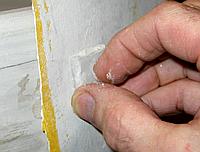
- When pot and pieces are both fully air dry, sand the edges square with aluminum oxide paper, then sand the surface that will match the pot to the correct curvature, using the pot as the guide.
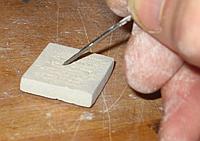
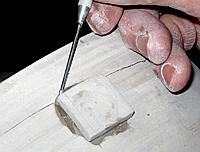
- Score the mating surfaces firmly in one direction on the pieces to be added, at right angles on the pot.
- Add a generous amount of slip to one surface, then immediately apply the piece to the pot in the position desired. Wiggle (rotate) the piece slightly while applying pressure to squeeze out excess slip until firm, then remove excess slip.
- Bisque then glaze as usual.
Making and Using Decals
Decals for pottery can be printed using any ink that contains a metal oxide. Most laser printer toners have iron in them - the ink for my HP LaserJet 4P is almost 50% black iron oxide. Decal sheets for home laser printers are available, so you can print your own.Here is a result, on Moore White Matte:
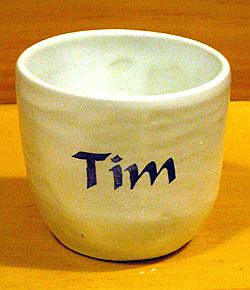
The glaze is fired in the normal way, the decal applied, then fired until the glaze is soft enough that the iron migrates into the surface, 1050°C for most cone 6 glazes. If you wish a reddish iron colour, hold the temperature at 950°C for half an hour to an hour during cool.