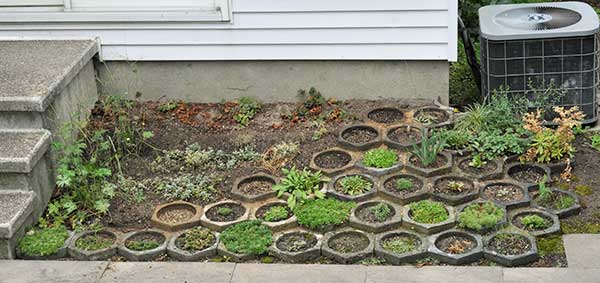
Hypertufa Pots for Ottawa Canada
Natural tufa rock makes containers that are a longtime favourite for growing alpine plants. Due to the expense of quarrying, shipping and carving it into practical containers, most growers make a more affordable substitute with concrete containing peat moss. There are dozens of recipes on the web using all sorts of proportions and additives, but the ingredients that define hypertufa are Portland cement, sand and peat moss. Moss decomposes and leaves a porous container, mineral additives such as perlite and vermiculite don't. The higher the proportion of peat moss, the more porous the container is, but the less likely it is to survive northern frost: -38C in the case of Ottawa.I'm casting hexagonal pots to partially bury in sand in the manner of Ireland's Giant's Causeway. Since web recipes that include any winter survival data all come from far to the south of Ottawa, I experimented, using a 1:1 ratio of cement to sand by volume, and ratios of cement to peat moss varying from 1:1 to 1:3, again by volume. They were left out over the 2013-14 winter here to see how well they stood up. The results: all pots with ratios of peat moss to cement higher than 1:2 failed over winter; several with 1:2 had minor failures. So, 1:1:1.8 Portland cement:sand:peat moss by volume is the mix I'll use from now on. All volumes are measured after tapping the container lightly to settle contents by gravity; the peat moss is dry.
Dissolve any colorant in water about half the volume of the cement, then mix with the sand and cement; the mixture should be fairly firm. The peat moss is separately mixed with clean water, again sufficient to give a firm mixture. Both are allowed to sit for ten minutes or so to ensure complete hydration, then mixed together thoroughly to ensure the peat moss is broken up and distributed evenly. This two-step process is needed so that the concrete keeps the colorant, rather than the peat moss adsorbing it; the moss is going to decay and any colorant in it will be lost. If you're not using colorant, everything can be mixed together in one go. Eye protection is needed against splatters - cement is dangerous to eyes.
The bottom of the outer form is filled, the center form added, then the sides filled. The center form is turned a bit each hour to keep it from bonding too tightly to the concrete to remove, then removed after 4 hours.
Everything is covered with plastic for 12 days, then the form is disassembled; a mallet and plastering trowel are useful to break the bond of concrete to form. Each pot is left for a further 12 days protected in my garage to set better, then placed outside exposed to weather for a month or so. The pot is finally sanded smooth with a belt sander, a few 6 mm holes drilled in the bottom with a carbide bit to ensure drainage, and put in place.
Colorants
As you can see below, I've added colorants to the mix to give a similar variety in appearance as natural rocks would provide. Colorant strength is measured in percent by weight of colorant compared to the Portland cement. A good colorant will give a distinct shade with 1% colorant and a solid shade with 3%.Colorants vary incredibly in their effectiveness. 3% Bomix Easy-Match Black gives the charcoal shade in the foreground below, but even 10% King GranAstar Black gives only a pale grey. The effectiveness of BlueConcrete.com Cobalt Blue was similar to the King black: very poor. So, in Canada use Bomix if you can find it, otherwise be prepared to try different local brands until you find one that works the way you want.
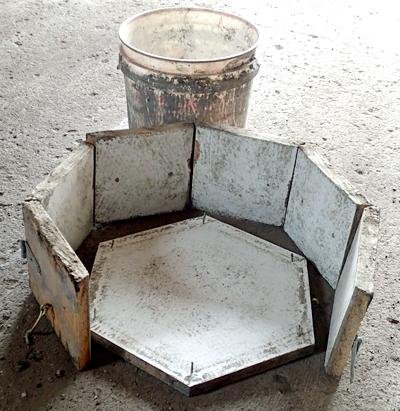
the form: a hexagon filled with a cylinder
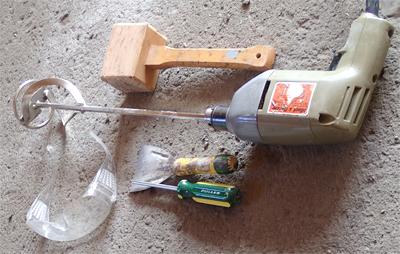
the tools I use
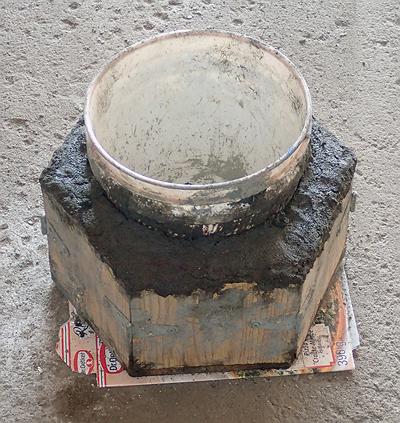
the form in use
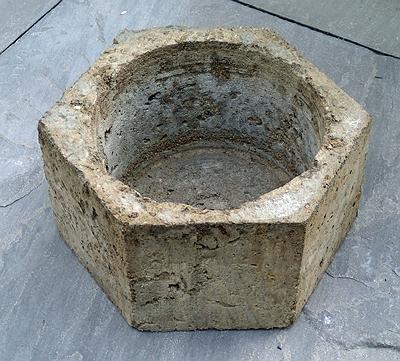
a completed pot