Enjoying the Birds of the Ottawa Valley
Getting Serious about Birds
Birding
A birder is someone for whom looking for birds and identifying
them is an avocation, or at least a primary hobby. An
ornithologist, on the other hand, looks at birds, at their
behaviour, anatomy, and abilities, while a naturalist appreciates
birds in association with other living things and their
environment.
The two essentials for a birder are a field guide and binocular.
For advice on field guides, see "Books on Birds".
How to Choose a Binocular
Binoculars are labelled by two numbers, such as 7x35. The first
number, 7, is the magnification. The higher the magnification,
the more difficult a binocular is to aim and hold steady. The
second number, 35, is the light-gathering power. The higher the
number, the heavier the binocular. A light-gathering power more
than five times the magnification is wasted for birding.
Wide-angle binoculars are heavy, bulky, and require that your eye
fit too closely to the eyepiece for comfort in cold weather. But,
the view makes it easier to keep track of warblers flitting
around in trees.
Most birders prefer a center-focus light-weight 7 power binocular
for general-purpose use. The most popular is the (recently
discontinued) Bushnell Custom 7x35.
A binocular is two monoculars (telescopes), mounted together with
a V-shaped hinge. The two must point in the same direction. Many
cheap ones do not.
To check a binocular that you are thinking of buying, hold it,
with the point of the V upwards, up to your eyes. Alternately
closing one eye, then the other, bend the binocular hinge until
both eyes see a circle of light. The circle should be sharp, all
around. Outside the circle should be perfectly black. You have
now adjusted the distance between the telescopes to match the
distance between your eyes.
Look for a brick wall, or similar evenly patterned surface. Stand
facing it, square on, from at least ten meters away, with no
glass or other obstructions in the way. Close your right eye and
focus the left telescope using the center-focus knob. Now close
your left eye, and
focus the right telescope using only the eyepiece +- adjustment.
You should now be able to close both your eyes, then open either
one in turn, and see the field in focus, without any feeling of
eyestrain. Everything should be in focus both at the center of
the field and at the edges.
Now, look for a building, at least 100 meters away. Close your
right eye. Aim the binocular so that the edge of the building is
precisely at the left edge of your field of view. Open your right
eye, close your left. If the binocular is in alignment, the
building will still appear precisely at the edge of view. As
before, alternate eyes as a check. Next, make sure, in the same
way, that the top of the building is precisely at the top of the
field of view for both eyes.
If the binocular is not in alignment, or if its focus is not even
across the field, do not buy it, no matter what the price. These
problems can not be fixed. Never buy a binocular unless you are
allowed to carry out these checks, on the actual binocular you
will buy, before you pay for it.
Expensive binoculars are more likely to stay aligned, despite
inevitable bumps in the field, than cheap ones. Their focusing
adjustments are more likely to work evenly over extremes of
temperature.
To see the difference between a cheap binocular (under $100 late
1985) and a moderately-priced one ($100-$250), look at a
telephone pole against the sky. The cheap one will show coloured
fringes along the edges of the pole, particularly if the pole is
at the edge of the field of view. The pole may also appear curved
when at the edge of the field. If you don't know whether you are
looking at coloured feathers or at imperfections of a binocular,
it's hard to identify birds!
The main difference between medium-priced and expensive
binoculars is the control of contrast. The Nature Canada
bookstore used to have a perfect demonstration site for
binoculars, overlooking the old Ottawa train station. A cheap
binocular showed sunlit parapets, with featureless shadows under
them. A moderately-expensive pair revealed shadowy pigeons,
nesting under the parapets. The extremely expensive Leitz
Trinovid enabled a viewer to see the colours of the pigeons'
feathers, because the brilliant light from the parapets did not
leak over into the shadows.
A binocular is the item of equipment you will use the most of
any, on whose quality you will rely to see crucial details of
birds from deep shadow to reflection-crazed waterfront. $250 may
seem like a lot of
money, but with care your purchase will last a lifetime. Oh yes,
if it comes with a case, throw it away. Binoculars have to be
available!
When you are really "hooked" on birds, you may add a 10x
binocular for shorebirds and gulls (I prefer a Bushnell
Broadfield 10x40 to any other, regardless of power), but most
confirmed birders get a telescope and tripod. A Bushnell
Spacemaster with the 22x wide-angle eyepiece is the most prized
scope. Some have a zoom eyepiece to 45x. Manfrotto is the current
local favourite among tripods. Another favourite "second
eye" is the shirt-pocket 6x24 binocular that you never feel
like leaving behind when you "aren't going to be
birding".
Other Equipment
Keep a notebook, and not just for lists or rarities. Review of
your own written notes is the best possible way to sharpen your
observational skills. It is the way to build evidence that a
particular bird action is diagnostic for, or strongly suggestive
of, a species identification. It helps you determine which of
your birding locations are the consistent "winners". And,
it brings back memories of those little experiences in nature
that glow in the mind.
The most exciting birds always seem to turn up on the worst days.
And, of course, for most birds, the buggier the better and the
more isolated the better. So, get a light knapsack, and keep in
it:
- a plastic cape (for when it obviously wasn't going to rain),
- a flashlight (to see owls and loose car parts),
- insect repellent (in an outside pocket so leaks don't wreck
your sandwiches),
- a compass (topographic maps don't show road names),
- a spare note pad and pencil, and
- a small first-aid kit with
- tweezers (for splinters and stuck film in cameras),
- small scissors (to trim adhesive tape and nails),
- gauze pads (woodland scratches are always longer than
prepackaged bandages), and
- adhesive tape (for everything from scraped fingers to
cracked canoes).
Take out your car jack and use it once, to be sure it works. Oil
it once a year to prevent rust seizing it up. Modern tires are so
reliable that most drivers tend to forget about them. But, you
will be demanding much more of them than most people do, when
driving into dumps and over back country roads.
During winter months, especially when owling, you will be driving
on little-travelled roads. Keep a warm sleeping bag for each
person in your party, and a change of clothing (in case of a fall
into water) in the trunk of your car at all times. Cars break
down when you least expect them to. Don't expect to be able to
hail a passing car for help any more. Drivers are now terrified
of mass murderers. It's safety first to plan for survival without
outside help.
Finally, get 1:50,000 scale maps for the areas you will be birding in frequently, from the
Energy Mines & Resources map office at Carling and Booth, Ottawa, or from provincial
Ministry of Natural Resources offices. (They are now available on-line).
These maps show most watercourses and significant wetlands in their area, the contours of
the land, and areas covered by trees. They also show even the most minor
road, as long as it existed at the time of printing. (Note: just
because a road is shown, it is not necessarily public.
Cartographers can't see No Trespassing signs on their aerial
photos!) They will help you to get to the little gems of birding
spots that follow in the "Checklist of Locations", and to find new ones.
Identifying Birds
How do birders identify birds? Let me start with a short tour of
our brain, where identification takes place.
Our brain has many distinct parts, but it is generally believed
that the part called the cerebral cortex is responsible for most
recognition of pattern in our lives, for consciousness, speech,
and logic. The cortex is divided into two sections, right and
left, connected by a bundle of nerves that communicate between
the two halves. Step-by-step (linear, or analytical) logic,
including the construction of grammatical speech, is done mostly
by the left side, while holistic (associative, or synthesis)
thinking is done mostly by the right. The two brains are very
nearly two different people.
In Canada, our schools rigorously train us to use the left brain,
to analyze concepts into separate pieces, to verbalize them and
communicate them. The right brain is not merely ignored, but is
specifically suppressed as being "illogical". Artists
have long known that the right brain perceives deeper truths than
the left. Artificial intelligence research is showing that the
right brain is just as logical as the left. Its logic deals
successfully with problems that are too complex for the left
brain to handle. Our brain can possibly think of a billion things
at once. Left brain logic seems to be limited to a dozen or so.
And, we can verbalize only one!
The best birders rely almost totally on the right side to build
(synthesize) an identification from what they see. They then
struggle, sometimes unsuccessfully, to communicate, through the
left brain, why they know what bird they have seen.
So, to identify birds well in the field, you must overcome your
schooling, and exercise your right brain until you use it as much
as your left. (Ornithologists and banders cannot afford the
uncertainties of right-brain methods, but, with a bird in the
hand, there is time for their left-brain techniques.) Many
birders begin this process by simply reading their childhood bird
guide for hour after hour, until they absorb it. But, more
effective ways of developing right-brain thinking are needed once
a left-brain mind-set has become entrenched with age. Here,
translated from well known methods used to train artists to
"see", is the best exercise I know of.
Pick a common bird, a male house sparrow, at your feeder where
you can watch it easily for ten minutes or so. Look at the end of
the bill, then trace every outline slowly with your eyes, saying
to yourself what you see: "stout bill with sharp point,
almost as thick as long, black, surrounded by black on face;
black patch, starts as a line at the top of the bill, then goes
to the top of the eye, down to the bottom of the eye, back almost
to the bill, then down the throat, broadens into a large patch on
the chest ..."
When you have finished, turn away and do relatively mundane
things unrelated to birds, wash the dishes or whatever, for about
half an hour. Then, do the same exercise again. There are a lot
of neat details on "just a house sparrow", aren't there!
After a while, you will be aware that when you look at the bird,
your mind is saying "house sparrow", quick as a blink,
and that, several seconds later, the "black bill, black
throat ..." routine surfaces in your mind. Your right brain
has now learned a bird, and has learned to communicate its
identity to your left brain. The left then starts to explain what
your right brain told it.
Now, continue with the actions of a house sparrow. Describe to
yourself the way it hops or runs, its actions while it feeds, the
way it takes flight, again for about ten minutes at a stretch.
Watch how fast it flaps its wings. As a bird gets heavier, its
wings get longer in relation to its body size. They flap more
slowly, or the bird flies faster. Birds that are heavy for their
size flap quickly and fly fast, like a one kilogram mallard.
Those that are light for their size flap slowly, like a one
kilogram great grey owl.
Watch the way it hovers over the feeder. Only birds with large
areas of wing in proportion to their weight (low wing loading, in
aeronautical parlance), and flexible joints, can hover for long.
Watch the way it flies. The wing of a small bird has more air
resistance (drag) for its upward lift compared to the wing of a
large bird. It's most efficient for the smallest birds to close
their wings and coast when not flapping. Medium sized birds flap
continuously (crows), larger ones flap then glide (ravens), while
the largest require so much energy to flap that they glide
whenever possible (turkey vultures).
After a while, you will be driving down the street, a bird will
flash up from the road some distance ahead, and your right brain
will whisper "house sparrow".
Next, listen to all the sounds it makes: the "chireep"
nest-site song, the "ch-ch-ch" of confrontation, the
nasal "kewkew" warning of predators, the many single-note
calls of a mated pair. When you awake in the morning, and your
first thought, at the "cheep" from outside the window, is
"house sparrow", your right brain has learned,
essentially, how to identify the bird in any situation where you
might encounter it.
I suggest that you choose a chickadee for your second exercise.
It is easy to watch one for long periods in association with
house sparrows. Its darting actions, due to its extremely light
weight, are so different from sparrows that you will become
sensitized to watching for this aspect of identifying birds.
Flight and feeding motions are an aspect hardly ever touched on
in field guides. All good birders rely heavily on them.
Then, choose a common bird from each bird family, so that you
will be acquainted with all major local types of birds. The
following are particularly suitable:
- city street/garden: robin (a thrush), red-eyed vireo, song
sparrow, hummingbird, house wren, blue jay.
- rural roadside: killdeer (a plover), red-tailed hawk (a
buteo), kingbird (a flycatcher), rose-breasted grosbeak,
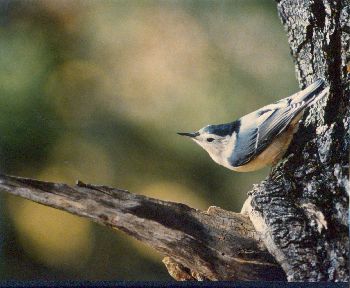
goldfinch, hairy woodpecker, white-breasted nuthatch.
- cattail marsh: pied-billed grebe, tree swallow, yellow
warbler, great blue heron, red-winged blackbird, black tern.
- Ottawa River: Canada goose, mallard (a "puddle
duck"), goldeneye (a diving duck), ring-billed gull, spotted
sandpiper.
From then on, take the world as it comes, one bird at a time.
Later, use the same technique to add a different dimension to
your knowledge. Pick one visible feature of a bird, then go
through your field guide studying just that one point on all the
birds that might appear here. Bill shape and size (compared to
the head) should be your first choice. Your field guide will have
further suggestions.
Photographing Birds
 Telephoto lenses are a necessity to get a reasonable image size
of any bird, except at a window feeder. You will find that 400 mm
is the most useful focal length with any but the tamest birds,
with 35 mm equipment. There are two types of telephotos, mirrors
and "normal".
Telephoto lenses are a necessity to get a reasonable image size
of any bird, except at a window feeder. You will find that 400 mm
is the most useful focal length with any but the tamest birds,
with 35 mm equipment. There are two types of telephotos, mirrors
and "normal".
Most mirror lenses have very poor resolution off center. (The
Nikon ones are notable exceptions.) All mirrors have two other
problems. The depth of field is less than with normal lenses at
the same f/stop. Unlike normal lenses, mirrors cannot be focused
wide open, then stopped down for the film to give more focusing
latitude. Their advantages are light weight, small size and low
price.
Normal lenses are of fixed focal length, or variable (zoom).
Locating a bird with a fixed long lens can be a real problem, but all but extremely
expensive zoom lenses have very poor resolution at these focal lengths. Ray
Holland used a fixed 300 mm for the photo at right. Since no one
makes accessory viewfinders any more, many precious seconds can
be saved in the field if you make your own sighting device.
Use a very solid tripod and a camera body with a well-balanced
mirror to minimize shake. Firmly fasten a lens hood to maximize
contrast (minimize flare) and to protect the lens from being
scratched by branches. The additional protection of a Tupperware
cover to fit the lens hood is worthwhile while on the move.
Rewind exposed film right into its cassette, to avoid
double-exposing an entire roll. (Pockets are not the best filing
systems.)
So outfitted, load your pockets with film, and practise judging
what a bird is going to do next. A breeding bird is either going
to hide, or sing from one of several singing perches around the
edge of its territory. Watch the bird for a while to locate its
favoured spots. The best technique with a non-resident bird is to
stay still, crouched down, while a friend persuades the bird to
move towards the camera. If alone, crouch and move slowly. Or,
stay in a car as a blind, hide behind foliage, or use a portable
blind, then use a tape recorder to lure a bird in to a singing
perch.
Avoid photographing birds on their nests. Especially, avoid
rearranging the nest surroundings to look photogenic. Eggs will
become chilled, or nestlings hungry, while you are around.
Predators are attracted by upset birds, and by unnatural scenery.
A photograph that results in the death of your subject isn't
worth it.
High-power strobe flash systems were required for quality colour
photographs of birds until a few years ago. Today's high speed colour
negative film makes them unnecessary except for photographs of birds in flight.
(I use Fuji 800 with no flash for almost all my bird photos.)
If you would photograph birds in flight, you will also be into things like scaffolding and
photoelectric shutter controls, far beyond the scope of this book.
The best bird photographs illuminate a special moment in the life
of the subject. Always ask "Why am I taking this
picture?" Compose a specific answer in your viewfinder. Ask
"What is the bird thinking?" Wait until the instant that
its action shows it.
Practise using extremes of depth of field, lighting, and colour
contrast to simplify your compositions. Especially, check the
background. Looking through a telephoto lens with its small depth
of field, it is easy to overlook background objects that turn a
good photograph into a mere snapshot. Start with subjects like
milkweed pods and insects, then progress to birds.
Finally, crop your pictures, even if you take slides. There
should be a balance between what your subject is
"saying", and the environment in which it is saying it. A
viewer's eye should be drawn into a picture directly, not have to
hurdle unwanted details around the edges.
But, be prepared. Bird photography means patience. Lots of it.
Drawing Birds
 Birds are creatures of motion. The first technique to practise if
you would draw them is the quick sketch, gesture drawing. Start
with simple unmoving objects: a single blade of grass, then a
bursting seed pod, then a bird skin in the Museum. Work at
reducing the number of lines you must draw while retaining the
essential features of your subject. When a friend can recognize
the species of a bird skin sketched in a single minute, you are
ready to enjoy drawing birds in the field.
Birds are creatures of motion. The first technique to practise if
you would draw them is the quick sketch, gesture drawing. Start
with simple unmoving objects: a single blade of grass, then a
bursting seed pod, then a bird skin in the Museum. Work at
reducing the number of lines you must draw while retaining the
essential features of your subject. When a friend can recognize
the species of a bird skin sketched in a single minute, you are
ready to enjoy drawing birds in the field.
Next, learn to draw movement itself. Draw a series of pictures on
pages of a pad which, when fanned, show a bird landing or taking
off from a feeder. Find a friend with a movie camera and single
frame viewer to study flying motions. You will soon see that
flying is hard work! Feathers have to push air around, lots of
it. Little feet have muscles to grab branches, to absorb landing
shock, and to launch a bird into the air.
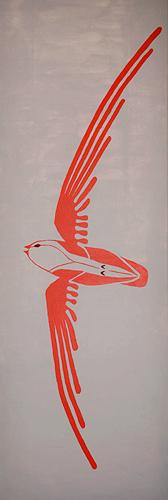
The study of "positive and negative" space is
particularly valuable for bird compositions. Many successful
drawings make a bird and its environment of roughly equal
importance. Symmetry is the most pervasive attribute of life.
Your drawing will be closer to nature when you come to terms with
symmetry, rather than deny it as many artists do. Try to draw
things from the bird's point of view, not yours.
To give your compositions strength, study oriental compositions,
where absolutely nothing is drawn except essential elements.
Inflate the essence of each fundamental element of your drawing
in turn, so each takes over an entire sheet, as abstract design.
Then superpose detail, layer by layer, or feather by feather, so
that the underlying form remains visible.
To spot essentials of form, take photos, then study them upside
down, sideways, or in mirror image. Light doesn't just bounce off
milkweed pods or feathers, it comes through them as well. We tend
not to notice such things until our recognition of everyday forms
is upset. My son Michael found new ways to see form in the art
style of the Haida of Canada's west coast.
An important technique, unavailable to all except the luckiest of
photographers, is to juxtapose two elements in a composition,
with a strong relationship (tension) between them that brings out
the character of each.
With your technical skills in hand, decide what to say with your
drawings. Birds are strong, mysterious, elegant ... Drawing
offers unlimited choices, more than any one of us can make use
of.
There are millions of lessons waiting to be learned while drawing
from nature. To learn them, you have to make mistakes. Get out in
the field, and start making them!
Recording Bird Song
Just as a photographer must compose a view of nature, a sound
recorder must compose a soundscape. Your composition tool is a
directional microphone.
The more directional the microphone, the more uneven its response
is to different frequencies, and the more difficult it is to use,
but the cleaner the possible composition. Most directional
microphones use sound wave diffraction and cancellation methods,
because these can be made to cover a wide range of frequencies.
Even though professionals use extremely directional (and
expensive) "shotgun" mikes,
you can obtain interesting results in quiet locations with an
inexpensive cardioid mike.
Most bird songs have no low frequencies at all, so bird recorders
can also use a parabolic reflector. This reflects sound into a
microphone, so the mike must face backwards, into the parabola.
It should be small (about 1 cm diameter for a 60 cm parabola),
and mildly directional to avoid receiving sound directly from the
bird. The gain of a parabola increases sharply with frequency,
typically from 2x at the 300 Hz of a great horned owl to 100x at
the 10 kHz of a blackpoll warbler. So, a frequency correcting
network must be used for birds like a cowbird (see "The Glory
of Song"). You will find one heavy, awkward in the bush, and
difficult to aim without making extraneous noise. But, they are
cheaper and more directional than a shotgun mike.
An inexpensive cassette recorder, cardioid mike and handkerchief
windscreen can produce results good enough to get you
"hooked". Since a chance recording of three Siberian tits
in 1972 with such equipment, Monty Brigham has gone on to record
255 Canadian species, and to produce several discs. Such
professional results, however, require a higher tape speed and
better recording level control than inexpensive systems allow.
With any machine, stick to one brand of tape (60 minute if
cassette), and have the machine's bias and equalization
specifically set for it. Bird song is much more demanding of a
recorder than is speech or rock music. Earphones must be light,
with foam cushions so you can hear birds outside the field of
your microphone. Best results also require flexible electronic
filters, to get rid of sounds outside the range of frequencies of
the species you are recording.
Just as a slide show is improved by a commentary, so your nature
recording will be best with a continuous background
"take", with selected focus recordings dubbed on top. The
background masks the inevitable differences in ambient sounds of
the individual "cuts". Such a recording also needs a well
thought out plan, as precise as that for a movie, and at least a
four-track overdubbing tape recorder (plus the field machine) to
implement it. But, the result can be the aural experience of
Monty's The Songs of the Seasons.
main page
next page